Monday, October 31, 2011

Happy Halloween!

Nothing is more fun to make than theme lunchboxes. Many of them are questionable in terms of wholesome ingredients, but if you look around on the Internet, you'll find many that are both nutritious and fun.

Here is what my kids requested: Deviled egg "eyeballs," roasted cauliflower "brains," and an onigiri jack-o-lantern. For the eggs, smooth the yolk with a wet finger, then add a slice of pimento olive for the pupil and a few threads of saffron for veins. (Saffron and eggs taste wonderful together, btw!) Usually I pack two egg halves in each lunch, but three eyes seemed more appropriate for Halloween, don't you agree? The onigiri is a ball of brown rice patted with grated carrot, with cut-up nori for the face. The kids like more nori, so I sent more in a side container.There was room left in the box, so a few chunks of hakurei turnip tightened everything up nice and snug.

Mom, make it stop staring at me! Deviled eggs, onigiri, turnips, roasted cauliflower.
The kids also helped me make marshmallow slugs, adapted from Martha Stewart's marshmallow peeps tutorial. (Once you get to the site, hover your mouse over the "ingredients and equipment" tab to find the recipe.) Marshmallows turn out to be one of those things that are surprisingly easy to make, yet people think you must be a genius. This recipe is notable because it uses no corn syrup, if your kids don't tolerate it. We use organic evaporated cane juice. You can also make marshmallows with agave or honey, if you prefer.

Sluggy goodness!

La Segunda tinted the sugar herself to just the perfect shade of chartreuse, and we used an old ZipLock bag with a corner cut off to pipe the slugs. Martha gets kudos for those bunnies and chicks--slugs are WAY easier to pipe! Work fast, before the marshmallow sets up. Once you have piped them all and sprinkled them with sugar, lightly drag a bamboo skewer along the head to pull up blobs for the slug horns. Let them sit for about half an hour to firm up, keeping a constant vigil to discourage ducks, chickens and other slug-eating predators, then store in an airtight container.

Thursday, October 27, 2011

Carrot Cups

Making a lunchbox beautiful is satisfying, and it's particularly satisfying when form and function meet. Such is the case with puzzle apples that are cut to hold peanut butter (that will be for a future post), and these carrot cups. They are really a flower-shaped garnish--each piece looks like a little flower, but you can also bunch several together to make a larger flower. Because they are cup shaped, they make fantastic scoops for hummus or other dips. You can find tutorials for these on YouTube, but here is a quick how-to:

Start with straight, fairly thick carrots and a small, sturdy, sharp knife. Cut three slices off the bottom so the carrot comes to a triangular point. Then begin making cuts above the first cuts and in the same plane. This is how you form the petals. Make sure to angle the knife toward the center of the carrot so all three slices will meet in the middle; follow the cuts you made to shape the point and you'll be fine.

These photos are all taken with one hand, leaving the other hand to balance knife and carrot. Keep both hands on your project while you cut! Safety first!

Notice that the knife is held parallel to the first cut and angled toward the center of the carrot. Do not allow this cut to go down to the bottom of the petal or your flower will fall apart.

Once you have cut in, rotate the point of the knife so that the blade is cutting parallel to the edge of the flower. You are trying to make the same three cuts as before to create a point inside the carrot. If properly done, the flower will come off very easily and the petals will be intact.

Since you can't slice to the bottom of the petal in the first cut, rotate the knife blade to cut down into the point.

Here is the flower falling off the carrot. See the new point? Keep making these cuts up the carrot. One carrot is enough for several flowers.


Here is the finished lunch box. Wasn't that fun? Expect to mess up a lot before you get the hang of it. There are so many variables, such as what knife you are using and how thick/hard/straight your carrot is. I began by practicing whenever I was making vegetable soup, and all the ruined ones went into the pot. After a while, you will be able to make them fairly quickly, and your kids will love them!


Monday, October 24, 2011

Kale Taboulli

My friend Katherine was telling me yesterday that kale is a complete food, and if you could eat enough of it to satisfy your caloric needs, you would never need to eat anything else. I believe it. Kale is low in calories, strongly anti-inflammatory, high in antioxidants, has a decent protein profile, and it's packed with chlorophyll. Once you start eating kale, you crave it. As for quinoa, it is sometimes called a super grain, although it is not in the grass family and so is not a grain at all. But it is definitely a super food. Combining quinoa and raw kale into one salad, dressed with olive oil and lemon, creates a nutritional powerhouse, and it's so yummy I could eat it for lunch every day. In terms of bento, kale tabouli holds up much longer than parsley tabouli--you could easily make enough for three or four days.

Traditional tabouli is a labor intensive dish, but not this one. The great thing about substituting kale for parsley is that, while parsley does not chop well in the Cuisinart, kale stands up very well and even improves, becoming dark green and tender. You can make a big bowl of it in no time. Both have the same dark green flavor--you will be surprised that you can hardly tell the difference. Usually I chop the mint leaves in with the kale. Chop the green onions by hand so they stay clean and fluffy; they can get slimy in the food processor.

Lots of dark green kale chopped in the food processor; can of delicious Greek olive oil looms in the background.


Once you have the greens chopped--the bowl above took about 5 minutes--you add in the minced green onions, cooked quinoa and dressing, and that's it. For a real treat, include chopped tomatoes and cucumber. I read yesterday that you can freeze kale without blanching it. Really? I'm going to try freezing kale later and see how it holds up. Here is the finished salad:

Gee, a lot of the salad seems to have disappeared. Hmmmm.......
Kale Tabouli

1 big bunch of kale
1 bunch green onions (in winter use a minced white or yellow onion)
1 handful mint leaves (in winter use the contents of a mint tea bag)
1 cup dry quinoa cooked in 2 cups salted water
1 or 2 lemons, juiced
olive oil
salt to taste
1 tomato and 1 cucumber, optional

First, put the quinoa on to cook in salted water. While it's cooking, get out the food processor. Strip the kale leaves from the stalks, tear them into pieces and stuff them into the processor bowl, adding some of the mint leaves to each batch. You can pack in quite a bit. Put the lid on, being careful not to trap any leaves, and pulse it until the kale is chopped and moving freely. Process until the kale is finely chopped.

Chop the green onion by hand; use the green tops and all. (When I was a kid, we used the green and tossed the white. When I grew up, I was amazed that many people use the white part and throw away the greens!) Also dice the tomato and cucumber, if using.

When the quinoa is cooked, remove it from the heat and fluff it up to speed cooling. Once it is cooled, mix it into the salad. Dress with olive oil, lemon and salt: First, drizzle on olive oil a little at a time, tossing as you go. Stop when each leaf is lightly coated with oil. Next, add lemon juice a little at a time, tossing as you go, until it is a sour as you like. Then add salt the same way. Done!

Thursday, October 20, 2011

How To Pack an Apple

For some reason, my kids prefer to have apples cut up. If it's cut up, they'll eat it; if it's whole, it comes home uneaten and travel weary. It makes sense, though: Kids enjoy being able to share slices with their friends. One fun way to pack an apple is the stripey way. It is simple to do and has a big visual impact--plus, you get to eat two different kinds of apples! For two people, use one red and one green or yellow apple. Here I have used a Fuji and a local Yellow Delicious. Cut them into eighths and put them in a bowl of cold water to retard browning. (Some people add salt or lemon juice, but I don't.)

Begin with a pair of one color, in this case green. Set them in so the top slice is against the edge of the box. Now add a pair of the next color, and continue alternating as far as your container goes. (These are two of the small containers that come in the Fit & Fresh system.) When your box is full, add one more slice to the top row. In this demonstration, there are three slices on the bottom row and four slices on the top. That will leave two extra slices for the cook! I love when it works out like that ; )

Tuesday, October 18, 2011

Yes, You Can--Beans!

Home-canned beans from Potenza Organic farms. Yum!

One of my kids' favorite lunches is quesadillas or chips served with a dip made of salsa mixed with black beans. I like to use the local organic beans in my pantry, but beans do take time to cook, even in the pressure cooker, and the quesadilla lunch is one I like to make on the fly. Then one day I spoke to my friend Ellen at Regional Access, a local-foods distributor. Ellen has been buying local organic beans and canning them herself. (Did you know you could do that? I didn't know you could do that.) What a great idea! You can have local, organic beans for less than the cost of buying canned beans, and what a convenience. It takes the same amount of time as just cooking beans!

All you need is a pressure cooker large enough to hold canning jars, and, of course, beans. (If you don't have a pressure cooker, consider buying one. They save time and energy. It will expand your repertoire tremendously.) Any pressure cooker large enough to hold jars will work. Mine is a 5-quart pressure cooker, and it holds pint jars or smaller. Most new pressure cookers come with a round, flat metal insert you put in the cooker to hold the jars up off the bottom.

Dip made from beans and salsa, plus organic corn chips. Apples, cookies and grape gelatin not pictured.
If you have never canned, it would be a good idea to look up more information about proper procedure. I can't go into that here. It is pretty easy, though, and satisfying. To pressure-can beans, soak the beans overnight, then cook them for about 1/2 an hour,  to make sure they are heated through. (I won't get into the "salt-or-no-salt" debate--just do as you see fit.) Pack the hot beans into the hot jars, put the jars in the pressure cooker, then process at 10psi for 60 minutes for pint jars. My jars held one cup each--that's half a pint--but I went ahead and cooked them for the full hour anyway, just to make sure the beans were soft enough. They came out perfect! It's great because you don't have to worry about the beans on the bottom of the pot sticking or burning--they all cook evenly and perfectly. Use what you need at the moment and let the other jars cool so you can put them away for another day--your "leftovers" are already packed and ready.

Thursday, October 6, 2011

The Envy Factor

My friend Matt packs lunch every day for his newly vegetarian daughter. It is an adventure. He has been posting the lunches on Facebook. They are not at all fancy, but they are appealing, and many of the elements he makes in advance, so his mornings are easier; in fact, this morning we met on the way in to school 20 minutes late--their alarm hadn't gone off, and we had houseguests. But all the kids had lunches. My point is that even though Matt is preparing lunches that are different from the norm, and even though they are simple to make, every day at lunch other kids stop what they are doing to watch his daughter unpack her box and open all the containers. Her lunch is an event.

When you are packing lunch for someone on a special diet, the "special" is an important factor. Instead of "poor me, I can't eat that," go for "lucky me, I get to eat this!" It does not have to be labor intensive to succeed, although it certainly could be if you are so inclined. Mainly, it has to look appetizing and be something your child is excited about eating. Colorful and fresh go a long way in this department.

Enviable lunches don't have to be hard. The extra labor involved is usually a matter of retraining your brain to plan ahead, and the more you do it, the easier it becomes, until you are planning ahead on the fly. Adjust it to suit yourself. I like packing bento boxes with a couple side containers, so my kids get the composed meal effect. Matt packs a bunch of individual containers all at once a couple times a week, so his daughter gets the "opening presents" effect when they are unpacked. What would work best for you? What containers could you keep on hand? What foods make you feel special?

Tuesday, October 4, 2011

Local Lunch

Black bean and cheese quesadillas, broccoli, hakurei turnips; green and red apples wedges; steamed delicata squash.
At a food conference last week, I was surprised to learn that, even among foodies, there is a lack of knowledge about how much fossil fuel goes into food. There is all the fuel involved in farm machinery and shipping, of course, but some of it literally goes into the food: Commercial fertilizers and pesticides are made from petroleum, as are artificial colors and flavors. Add to that all the petroleum used in packaging, both in the packages and in the running of the machinery, and suddenly you see that processed food from far away can have a huge carbon footprint.

Fortunately, there is something you can do; in fact, if you are reading this, you are probably already doing it: As much as possible, cook food from scratch, and as much as possible, use local organic ingredients. Changing our eating habits can reduce our petroleum consumption as much as changing our driving habits. The lunch above is a perfect example: The produce was all grown on farms within a mile of our house; the apples are not organic, but the other produce is. The cheese was made in the region. Even the black beans in the quesadilla came from a local farmer. The only non-local element is the brown rice tortillas.

By cooking food from scratch as much as possible, we are doing something important to reduce waste, and probably reduce waist as well. Keep up the good work!

Friday, September 30, 2011

The New Favorite: Taco Rice!

Rice with taco filling and black-olive garnish, shredded lettuce, chopped tomatoes, avocado cubes with lemon and salt.
The Taco Rice tastes just as good as it looks. Thanks so much to JustBento for the inspiration. The kids begged me to send it again, and mom and dad loved it, too. It's my new standby! Even better, it was easy to make a lot of it, then freeze it in portions and just heat it in the morning. We made ours with beef, but you could easily make it with tofu, or tempeh, or black beans, or whatever your family likes. Keep in mind that tofu gets sort of tough and crumbly after it has been frozen, sort of like ground beef, so that would work well with this particular dish.

I had cooked a 5# chub of beef on a cookie sheet in the oven, then put most of it into a ziplock bag before making the taco topping. If you are using ground beef, be sure to drain off all the grease. I separated the grease from the broth and put the broth back into the taco meat. For real tacos, you want the filling somewhat dry so it doesn't drip, but for taco rice, the filling should be wet to help flavor the rice. Wet filling also freezes into more solid blocks. (See my attempt at a recipe below.)

After everything was prepared, I put the bag of ground beef on one side of a clean cookie sheet and portioned the taco topping into the liners on the other side. The only way to cook three meals a day while working is to be efficient in the kitchen. Prefer foods that can be cooked in quantity and put aside for later meals. (Now that I work from home, I have time to cook and to blog about it. Before, I just worked and cooked.)

Once the blocks are frozen, peel off the liners and put the blocks into a bag in the freezer. I made 10 blocks--that's 5 lunches! In the morning, simply reheat as many blocks as you need while you warm the rice. I like this lunch because fellow diners seldom remark "yuck" to tacos--the envy factor is pretty high.

Bag o' beef and lots of little cups of taco topping waiting to go into the freezer.
If you have kids who like different kinds of food, the freezer stash can make it possible to prepare two different lunches with little extra trouble. I already freeze hummus and taco topping, and am thinking of other foods that would freeze well. Teriyaki chicken and green beans? Black bean chili? Macaroni and cheese? If you have an idea about what might be kept in the freezer, please share!

Bento Mom's Taco Meat

one pound cooked ground beef, well drained, broth reserved
one diced onion
one clove garlic, crushed
~one Tbsp ground cumin
~one tsp crushed oregano
~two tsp paprika
~one cup leftover tomatillo salsa
the secret ingredient: one squirt of catsup
(optional: one cup cooked black beans)
salt to taste

Fry the onion and garlic; add the meat and seasonings, plus the reserved broth and a squirt of catsup. Add salsa or water to make it moist; there should be liquid in the bottom of the skillet. Put the lid on, turn the heat down, and let everyone get used to each other. Adjust the seasoning to your own taste. If you don't have tomatillo salsa, add regular salsa, or cilantro, or chipotles in adobo, or just look up a real recipe This is the internet, after all.

Wednesday, September 28, 2011

Kale Rolls from Leftovers

Kale rolls, green beans, Greek yogurt, carrot flowers
Last night we had the simple version of a Lebanese favorite; actually, several Lebanese favorites rolled into one, so to speak. When I was a kid, we were always thrilled to eat grape leaves, cabbage rolls and stuffed zucchini. They were all made with the same stuffing, and the zucchini and cabbage had tomatoes or tomato sauce added. Yogurt was always served on the side. These days rolling is too much work; to make it easy, I just layer the vegetables and stuffing into the slow cooker or pressure cooker. Yesterday when I was processing a mountain of ground beef (more on that next time), I decided to make this for dinner. I had enough cabbage for one layer and enough zucchini for another layer, but absolutely no tomatoes. It still came out great.

While "unstuffed" vegetables is a delicious meal, it is not at all a good-looking meal. There was just enough left to send for lunch, but how to present it in an appetizing way? Luckily I had some kale, although any large leaf would work. I steamed the kale and rolled the filling inside. A whole pot of these would be tedious to roll, but four was no trouble at all. There, that's better.

We happened to have Greek-style yogurt, which is thick, not runny, so it could just go into the silicone cup. The only other thing I had to fill up the box was green beans, which made the lunch a bit monochromatic, but a scattering of carrot flowers saved the day. The carrot flowers are very easy to make and kids love sharing them.

The chef in the YouTube video uses a citrus tool to make the channels; you can also do as I do and cut small grooves with a sharp knife. His way is easier, though ; )

Monday, September 26, 2011

News Flash! Frozen Hummus a Big Hit!

Hummus with roasted red pepper, steamed spinach with sesame oil and soy sauce, hakurei turnip, steamed green beans, carrots, lettuce, olives; home made applesauce with frozen raspberries; melon chunks
The frozen hummus has been working out great. I have been taking the cubes out of the freezer at dinner time and popping them back in to the silicone liners to thaw. By the time we're washing dishes, it is thawed enough that I can put it in a bowl and stir in other ingredients, if I want. Tonight I added roasted red pepper, just to change it up. This lunch was already easy to make the night before, and the frozen hummus makes it super fast.

I read about Japanese Taco Rice yesterday on Just Bento, one of my favorite blogs. In this episode, her husband uses couscous instead of rice, but you can see some nice taco filling and toppings. It looks so good! It made me think of my frozen hummus cubes: I bet you could make a lot of taco filling and freeze it in the silicone liners to keep on hand. Then when you have stir fry and salad for dinner, you could quickly whip together a couple taco-rice bentos with lettuce, tomatoes, onions and cheese on the side. Stay tuned for further updates...

Thursday, September 22, 2011

Another Week of Menus

I like the kitchen, but it's nice to spend time in other rooms, too. One fun thing is to make lunch while making dinner. Of course, regular leftovers for lunch is always an option, but it can also be fun to create a different meal using the same ingredients.

Here is another week of menus I created for our CSA (community-supported agriculture), featuring ways to make lunch while you are making dinner. Being for the CSA, they are produce-rich. Below are the lunch and dinner main courses. This is just the bento part and assumes you have other sides to send as well.

These are suggestions to get you started, using foods I commonly cook, so some are similar to the previous week of menus. You can do the same with the foods your family likes. There are a few recipes at the bottom for the starred menu items. Happy eating!

Dinner: Stir fry with short-grain white rice and green salad. Lunch: Sushi rolls with cabbage salad and edamame.
 
Put on the rice to cook, and boil water for edamame. These can cook while you prep vegetables. When they are done, drain well, then salt. Set aside.

While chopping vegetables for stir fry, chop up a little extra cabbage and carrot to make a small cabbage salad to serve with the sushi. Dress lightly with mayo or sushi vinegar*. Also, cut anything you might want to put in the sushi, such as thin strips of carrot, cucumber or avocado. You can also simply mince up some leftover stir fry to use as a filling.

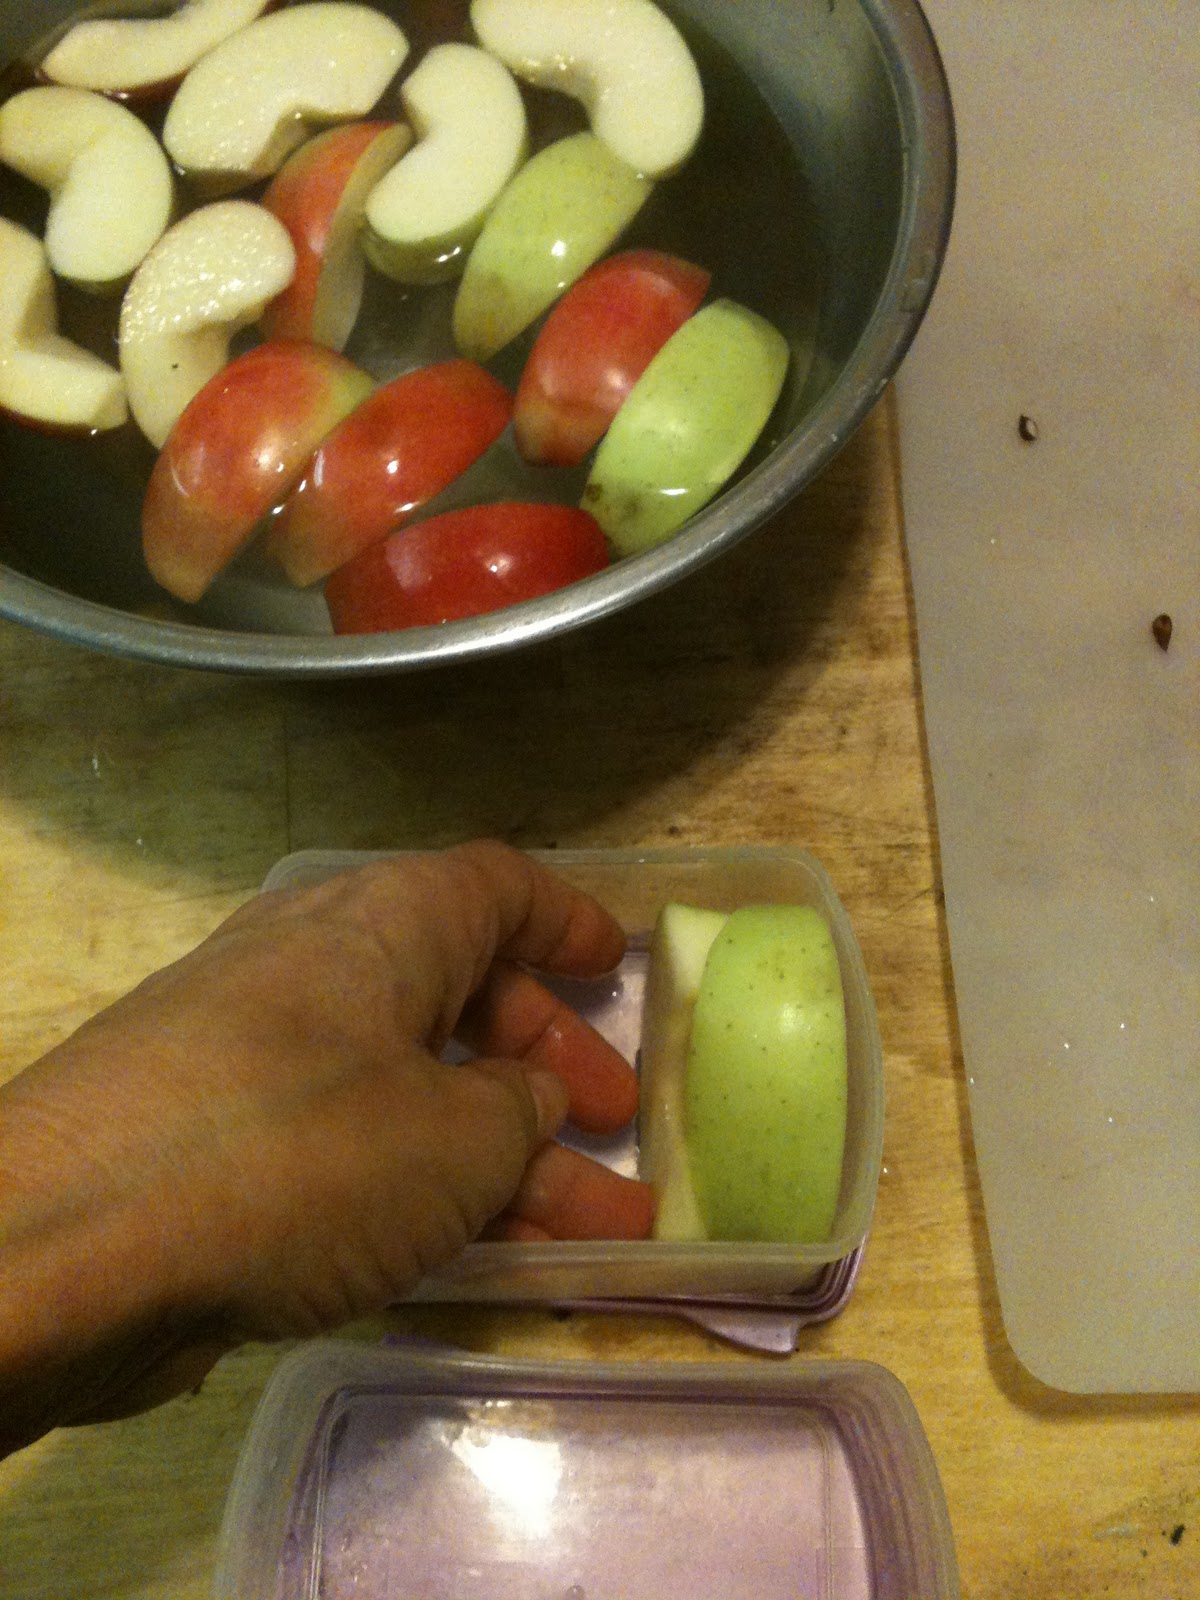
As soon as the rice is cooked, set some aside for the sushi rolls, about 1 cup per roll. Season with sushi vinegar*. Either now or after dinner, make the sushi rolls using vegetables from dinner, strips of tofu, or tuna salad made for the purpose. Cut the sushi rolls in half. Pack two half rolls plus a 
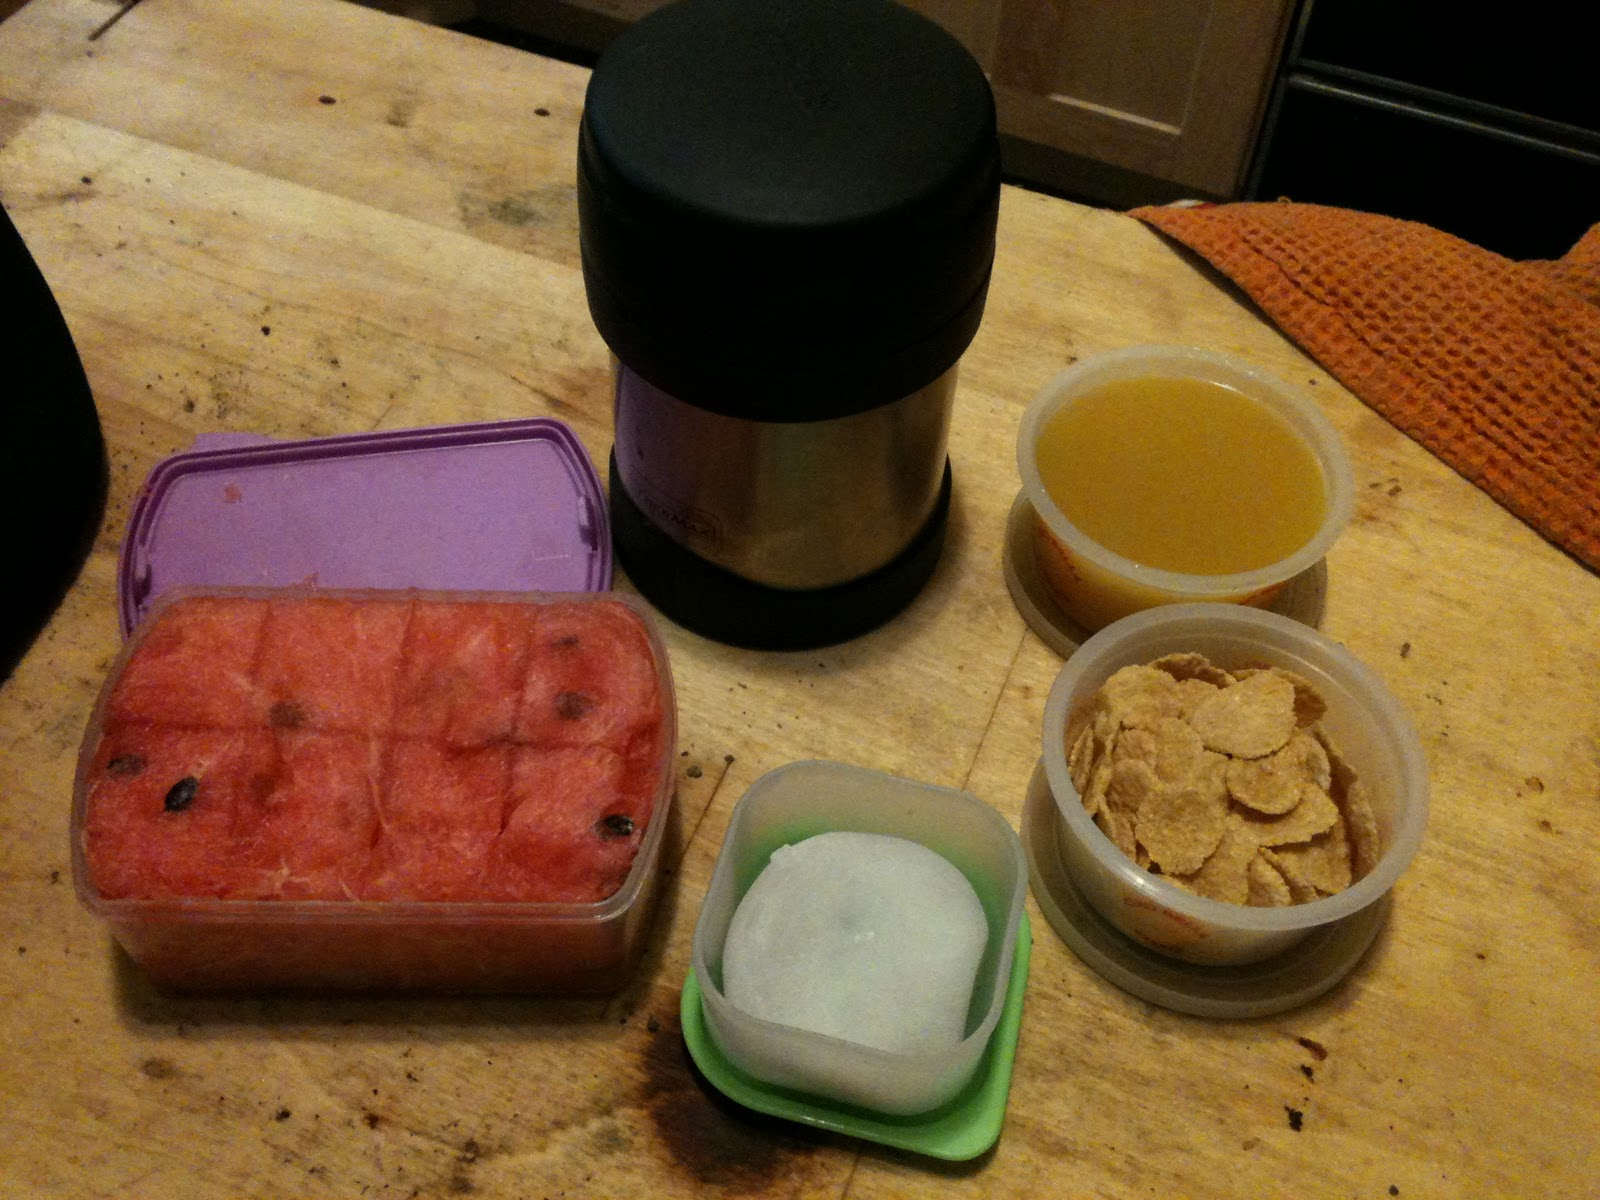
little container of salad in each sandwich box. Put the edamame in a separate container, or use them to fill any spaces in the sandwich box.

Dinner: Black bean soup, green salad. Lunch: black bean salad* with corn, tomatillo salsa* and red peppers.
(For omnivores you could put chicken in the salad or a piece of sausage on the side.) 
If you're using dry beans, cook them, then set 2 cups of drained beans aside to cool. While you are finishing the soup, cut the corn off the cob and dice the red pepper. You could also add some diced celery and/or carrot. Stir in 1 cup of tomatillo salsa. Pack into individual small lunch containers. Put tortillas or chips in a separate container.

Dinner: Roasted vegetables, sausages, cole slaw. Lunch: Torte*, cole slaw.
While the vegetables roast, beat a few eggs with a little salt and milk, and grease a 10-inch cast-iron skillet. When the vegetables are roasted, put some aside for the torte. Leave the oven on; turn it down to 325. Roughly chop the roasted vegetables, mix them with the eggs, then pour it all into the skillet. (If you have leftover cooked spinach, zucchini or broccoli, that could be added as well.) Let it bake in the oven for 35 to 45 minutes--while you have dinner! Before serving dinner, put aside some cole slaw for lunch. After dinner, let the torte cool while you clean up. Pack slices of cooled torte into a sandwich box, along with a little container of cole slaw, and a piece of leftover sausage, if any escaped.

Dinner: Enchilada casserole with GF sauce*, steamed green beans, green salad. Lunch: enchiladas, green bean salad.
I prefer to layer the enchilada ingredients rather than roll. You can fill them with grated cheese, black beans, corn, cooked meat, or whatever your family likes. Since you will be serving this for lunch at room temperature, avoid greasy beef or anything that has solid fat at room temperature. (If you have black-bean salad or tomatillo salsa left from the other day, you can use it here.) Put aside a little of the sauce to send with lunch.

While the casserole bakes, steam the beans. Dress some in butter for dinner. Dress the lunch beans with vinaigrette, or simply with olive oil and salt, because butter is greasy when it's cold. When the casserole is done, allow it to cool for about 10 minutes, then put aside the portions you will need for lunch. If you cut them first, you can make sure the lunch portions are presentable; by the end of dinner, a casserole can get a little funky looking. Pack the casserole slices right into the sandwich boxes with the green beans on the side. The tortillas in the casserole soak up the sauce, so your diner will appreciate that you packed a little extra sauce as well.

Dinner: Black-eyed pea soup with ham hocks and bread. Lunch: Akara* with chopped vegetable salad.
Soak enough black-eyed peas for both dishes. Put 3 cups of soaked beans into the bowl of the food processor for akara. Put the rest in the soup pot with the ham hock and let them cook. 

Meanwhile, chop vegetables for the soup, putting a small portion of each vegetable into a bowl for the raw salad. Some suggestions for soup would be celery, onion, carrot, tomato, peppers, zucchini, beets, celeriac and parsnips; you can use similar vegetables for the salad. They don't have to be the same. Also add about a half cup to a cup of chopped onion and a half a cup of chopped pepper to the soaked black-eyed peas food processor bowl. 

The beans should be simmering by now. Add chopped vegetables to the the soup pot (along with any leftovers from earlier in the week that might be good in the soup). Chop some parsley and/or cilantro; add some to the soup and some to the food processor. Dress the salad with vinaigrette and put it aside. While the soup finishes cooking, make the akara. Cool the akara, then put into sandwich boxes; add a silicone muffin cup with the vegetable salad. Include a container of catsup or other dip. By now the soup should be cooked; season to taste and serve.

RECIPES


Sushi Rice

1/4 cup of Japanese rice vinegar (I sometimes use white balsamic or apple cider)
1 tablespoon of sugar
1 teaspoon of sea salt

Add enough to your rice to give it flavor, but not enough to make it soggy. I usually quadruple the recipe and keep it on hand. It keeps fine on the counter.

Fresh Tomatillo Salsa

Tomatillos, onion, cilantro, lime juice, salt. Quarter enough tomatillos to half-fill your food processor bowl. Add a small quartered onion and a handful of cilantro. Pulse to chop; leave some texture. Season with lime juice and salt. Yum! It will be a bit watery; that's normal. Serve on EVERYTHING. This would be good in the enchilada casserole, with the black-eyed pea soup, or the akara.
 
Black Bean Confetti Salad


Black beans, fresh corn, carrots or red pepper, tomatillo salsa. Drain the beans, mince the carrot or red pepper, and cut the corn off the cob. Mix together. Add salsa to taste, and extra salt if desired. Yum! Use up leftover salad in the enchilada casserole.

Torte

3 cups roasted vegetables, or 1 large zucchini
1 medium onion, chopped
3 eggs
1 cup breadcrumbs or cracker crumbs
1/2 cup grated parmesan cheese (optional)
1/2 tsp. salt
1/4 tsp. pepper
1 tbsp olive oil
Wash and trim zucchini, if using; steam in hot salted water for 10 minutes; drain and cool. Saute onion in olive oil. Dice the cooked vegetables. Beat eggs and mix in bread crumbs, parmesan cheese, and seasonings. Add vegetables and onions and mix well. Turn into greased 8x8 baking dish and bake at 350 for 45 minutes or until knife comes out clean. Cool well.

Faux Enchilada Sauce, Gluten-Free (sorry this is not a real recipe)

tomato (sauce, diced, puree, paste, whatever)
canned chipotles in adobo, to taste
olive oil
garlic
onion
chili powder (or paprika, cumin and oregano)
salt
tiny pinch of cinnamon

Put everything into the food processor. You may sautee the onions and garlic first if you like. If using tomato paste, add water. Blend and taste. Use.

Akara
(adapted from congocookbook.com)

What you need
  • three cups soaked black-eyed peas or similar
  • one small onion, quartered
  • one-half teaspoon salt
  • hot chile pepper, or a piece of sweet green pepper or sweet red pepper, roughly chopped
  • cayenne pepper or red pepper (to taste)
  • one-half teaspoon fresh ginger root, peeled and minced (optional)
  • vegetable oil for frying
What you do
  • Pulse beans, onions peppers and salt in food processor until you have a paste.
  • Heat oil in a deep skillet. Make fritters by scooping up a spoon full of batter and using another spoon to quickly push it into the hot oil. Deep fry the fritters until they are golden brown. Turn them frequently while frying. (If the fritters fall apart in the oil, stir in a beaten egg, some cornmeal or crushed breadcrumbs.)
  • Serve with an African Hot Sauce or salt, as a snack, an appetizer, or a side dish.
  • Variation: Add a half cup of finely chopped leftover cooked meat to the batter before frying; or add a similar amount dried shrimp or prawns.

Wednesday, September 21, 2011

Before and After

So I call myself Bento Mom, but that really is a misnomer. I'm not Japanese, nor do I play a Japanese person on television. I have never been closer to Japan than Little Tokyo. What I have done is read up on bento and find lunch ideas that work for me. I'm not into the fancy "painting with food" bentos, but I do like the skill of using what you were going to send for lunch anyway and making it look special. For example:

Everyone in our house is still sick, so the one person leaving the house gets leftovers for lunch, in this case some roasted cauliflower and potatoes with a devilled egg. It tastes good, but it's all so--beige. The paprika on the egg helps, but not much. I have met children who eat only foods in the white/tan/beige color (or lack-of-color) spectrum. For such people, this is an ideal lunch. To me, though, this lunch looks like a container of leftovers. If you would like to convey more intentionality and thought, you can punch it up with very little effort:

This is the same lunch, still made with food that happens to be in the fridge. It's not the height of bento, but it is a big improvement over the previous presentation. It took about one extra minute to put the cauliflower in a contrasting silicone cup, slice half a carrot, and add some pickled green beans and a cilantro leaf. Foods in the dark green and the red/orange spectrums add visual interest. Other red foods that work well and are often handy include cherry tomatoes, cooked beets, red peppers, strawberries, little cheeses in red wax, dried cranberries or a few grapes. Green foods can be any edible leaf, green beans, edamame, cooked lima beans, green peppers, or cucumber slices with some peel left on. Sprinkles can include toasted sesame seeds, crushed nori, or finely scrambled egg. Pickled vegetables like gherkins, olives or pimentos are easy to keep on hand and can effectively break up a vast expanse of beige.

If I can get metaphysical for a second, one way people know you care about them (for good or for ill) is when you give them your attention. Although composed of virtually the same foods in the same about of time, the second presentation conveys a sense that someone paid attention to the lunch bearer's dining experience. That is the most nourishing thing in the box.

Tuesday, September 20, 2011

Lunch Muse

My friend Matt, local photographer and single parent, was recently challenged by his daughter's decision to become a vegetarian. Because we all know that single parents need extra challenges. Matt is not now, nor has he ever been, a vegetarian. "What am I gonna cook? What will I send her for lunch?" In his infinite resourcefulness, Matt has not only been cooking her some amazing dinners, but has been posting photos of his lunch creations on Facebook. Luckily his daughter likes fresh fruits and veggies, which simplifies packing, but with his photographer's eye he combines various colors and textures to create lunches that seem simple on the surface, but which are a feast of color and flavor. For instance, in one container are bright red peppers and sections of yellow corn cobs; in another, some raw green snow peas; in another, crackers and cheese slices, or maybe a container of pasta and a container of sauce. He might also add a banana or an apple and some snack bars to the box, and maybe a baggie of pretzels, and she's good through all her after-school activities. Lots of color, lots of choices.

While packing bento-style is fun, some foods do migrate, and some eaters, Monk-like, don't want their foods to touch. This morning's lunch was like that: a beautiful black bean-corn-and-salsa salad that was destined to leak all over everything else in the container. So I drew inspiration from Matt and used separate containers. My lunch came out less colorful than his (and less well photographed), but it will be tasty, I hope:

Yellow beets, black bean salad, honeycrisp apple, jello with pineapple, corn flakes.
My original plan was to send the black bean salad with quesadillas and do it all cute, but La Primera woke up sick, and La Segunda eats very little lunch anyway, so this represents the simplified version. Matt's inspiration came just in time. The beets and jello were made on Sunday; the bean salad was made last night while I was making black bean soup for dinner. I set aside two cups of beans as soon as they were cooked and made the salad while the soup was finishing. So this morning I only had to cut the apple.

Even though Matt was challenged at first by his daughter's dietary choices, he has totally risen to the occasion. To steal a quote from his FB page "I never ate so healthy until my daughter turned veggie!!! Thanks kiddo!" Dietary "restrictions" can open up a whole new world of good eating.

Here are two recipes that you might enjoy: one for the tomatillo salsa, and the other for the colorful black-bean salad.

Lori's Fresh Tomatillo Salsa

Tomatillos, onion, cilantro, lime juice, salt. Quarter enough tomatillos to half-fill your food processor bowl. Add a small quartered onion and a handful of cilantro. Pulse to chop; leave some texture. Season with lime juice and salt. Yum! It will be a bit watery; that's normal. Serve on EVERYTHING.

Bento Mom's Black Bean Confetti Salad

Black beans, fresh corn, carrots or red pepper, tomatillo salsa. Drain the beans, mince the carrot or red pepper, and cut the corn off the cob. Mix together. Add salsa to taste, and extra salt if desired. Yum!

Monday, September 19, 2011

Getting Ready with Sides

It's Sunday--in my world, that's time to get lunches prepped for the week. Bento blogs mostly focus on the main dish, but the sides can really save your butt. It only takes about an hour to prep them, and usually I'm doing something else in the kitchen anyway. I don't always prep my sides, but I am always so glad if I do.

This week, I put three things in my stash: cookies, gelatin and apples. The three together are a kind of insurance. They are all nutritionally dense, with enough protein, fat and fiber to get a kid through the day. The gelatin helps the body absorb the minerals and protein that are in whatever food they manage to eat. All three elements do contain sugar--not so good, but to some degree you get to control what kind of sugar (for instance, the gelatin is sweetened with stevia), and the sweetness acts as a lure: I can be pretty sure these three things will get eaten if nothing else does. If those three things are in there, it becomes less important what else I send. So if I'm up all night with one sick kid, I can add peanut butter to the apple, include some chips and salsa or a thermos of leftovers, put in cookies and gelatin, and 5 minutes later the other child has a decent lunch. Would you like breakfast, dear? Here's the cereal. Wash your bowl; I'm going back to bed.

These are peanut butter/granola cookies made with homemade GF granola and some Callebaut chocolate shavings (recipe below). They are filling and nutritionally dense. If your child talks instead of eats at lunchtime, they will at least eat these, or hide them in a pocket to eat on the playground. Cookies are also good for student athletes who need bigger lunches to carry them through after-school practices. Store them in the freezer to add a cold element to the lunch bag, and to keep little mice (or big mice) from snitching them.


These gelatin cups are made with canned pineapple. I poured the juice into a measuring cup and added cranberry juice for color, then brought it up to 3 cups with some limeade. It wasn't sweet enough, so I added stevia. Each Sunday I make 4 cups of gelatin to fill 10 little containers and stack them in the fridge so they're ready to go in the morning. You could put anything in the cups: gelatin, yogurt, applesauce, pudding, or whatever your family favorites are.

There is a risk of putting something messy into a snap-top container. Unless your diner is very careful (mine aren't), the top can pop off, spilling the contents into the lunch bag. Yuk! If you can get screw-top containers, that is the best. Another solution is to put the snap-top containers into a larger, rigid container. Or do as I do and add enough gelatin or agar to everything to make it more solid. Gelatin and agar add significant nutritional value as well. Here's a link about gelatin from the Weston Price Foundation: http://www.westonaprice.org/food-features/why-broth-is-beautiful


An apple a day....Gosh, I love apples. When I grew up in California, you could get three kinds: red delicious, golden delicious and rome beauties. When granny smiths started appearing, it was a big deal. Now we are in apple heaven with countless varieties to choose from now that fall is here. Apples stay nice all day, even cut up, and they're tasty and filling. All I do on Sunday is wash them. Usually in the morning I cut them cut up, sometimes adding cinnamon, sometimes adding peanut butter. Be sure to soak the slices in cold water (some people add lemon or salt) to retard browning. Our favorites are honeycrisp, fuji and gala--what's your favorite?


Flour-free Granola Cookies 
(I am not a recipe tester, nor am I good at following recipes. This is more of a guide.)

1 cup peanut butter (or the nut/seed butter of your people)
1 cup GF granola (instructions in an earlier post)
2 eggs
1/2 cup sugar (more or less to taste; how sweet is the granola?)
1/2 tsp baking soda OR 1 tsp baking powder*
1/4 cup mini chocolate chips (more or less to taste)
NO VANILLA! If you add liquid, the peanut butter separates

If you overmix, the peanut butter will separate, so stop the mixer as soon as it is all combined. Use an ice cream scoop to portion onto a cookie sheet. Flatten a bit, then bake as you see fit.

*If you can't find GF baking powder, just use half the amount of baking soda and make sure there is a little acid in the recipe for it to react with, like vinegar or yogurt or fruit. I don't know what acid is in this recipe, but the cookies came out fine.

Mara's GF Peanut Butter Cookies

Here is the original actual recipe that the above recipe is based on. These rock. Do NOT add any liquid, even vanilla, or the peanut butter will separate. Because there is no flour, the peanut flavor really pops--these are the best peanut butter cookies you can make!

1 cup peanut butter
1 cup sugar
1 egg
1 tsp baking powder

Friday, September 16, 2011

As Promised, the Lame Lunch from Tuesday

A thermos of leftover soup, mango gelatin, corn flakes, mochi with red bean paste, cut-up watermelon.
It's true; despite your best efforts most of the time, some lunches are just lame. You don't plan ahead, or you overslept, or you barely slept at all because a kid crawled in next to you at 3am, or D, All of the Above. You wake up, look at the clock and say---well, no sense repeating it, you know what to say.

This lunch, for instance, has too much sugar and not enough fat. Sure, there is nutrition in the soup, and La Primera ate everything, but La Segunda ate the sweets and ditched the soup and came home crabby.

On the other hand, that story I told the other day is true: I really did visit the cafeteria and find the kids eating cold whole-wheat tortillas topped with cold grated cheese and chopped tomatoes, which they told me in all sincerity was "pizza." I mean, come on! Even without a name, the toppings were totally falling off--it was impossible to eat. Why not roll the fillings in the tortilla and call it a burrito? Then, even despite the cold ingredients, it would be easier to eat and they would not be lying to children. How can they lie to children about pizza? It's the ONE food all children can correctly identify, and the school, which is supposed to be the source of knowledge, pulls the rug right out from under them. Eloise thought she hated lasagne because she once tasted the cafeteria version, but Aunt Jenny's lasagne set her right again. The one thing school lunch has going for it is the human element. The cafeteria ladies are nice, and the food, though assembled from government-surplus ingredients, is at least handled with affection for the children, and that is something of value.

Unlike Lunchables. Lunchables make me cry. Everything about them is wrong and disgusting. On the physical plane you have the lack of nutrition and freshness and genuine deliciousness; on the spiritual plane, what message are you sending to a child when you send them to school with that? It makes me think of an awful moment in the Family Dollar last week when I heard a middle-school-aged boy say to his mother, "Is this my dinner?" and he was holding two packages of candy. She responded in the affirmative.  No, she was not joking. Yes, it was his dinner, and he wasn't very happy. Kids know.

Bento mom is on her soapbox, people. When I told my kids about the boy who got candy for dinner, first they thought he was joking, and then they said, Lucky! Because they do not have candy for dinner, or Lunchables. Sometimes as a treat we have ice cream for dinner and dinner for dessert, just to mix it up. The worst lunch they have had to have is the one pictured above, or, yes, apples and peanut butter. Or salsa mixed with refried beans and served with tortilla chips, with a cut-up organic apple on the side. Anything I can scrape together will be made of better-quality ingredients than cafeteria fare, and nothing in my cupboards is as nutritionally or emotionally dead as Lunchables.

If you keep decent-quality food in your house, you cannot pack a bad lunch. So just get over it. Your children are ambassadors of good food, and even though some kids tease them, other kids want a bite.

To conclude, I know you are curious about the watermelon, how it fits so perfectly in the container. Here is what you do: Find a lidded container with thin sides. Slice the watermelon as thick as the container is deep, or just a bit thinner. Press the container into the slice like a cookie cutter. Cut into sections. That way, the kid gets as much melon as possible, and the pieces don't get all bruised and watery from jostling around. Happy packing!

Wednesday, September 14, 2011

How to Do a Two-fer

Wow, that was awesome!

Thanks for the outpouring of support on yesterday's blog. One friend wrote that it made her feel like a "bad mom" until she got to the end, where I advocate flinging an apple and some peanut butter into a bag and shoving it at the child rushing out the door. Mind you, this woman is an amazing artist, but I am willing to bet that, because she is a real artist who takes chances, she may have created one or two things that made her go, "Wait, what was I thinking?" It's all part of the learning curve and the exploration process, although in the case of art, no one has to actually eat your failures or try to explain them to fellow diners. In cooking as in art (and mothering), the best way to learn is to do it. So as a follow-up to yesterday's post, here is one way to make lunch and dinner simultaneously:

Say you decide to make chicken with boiled potatoes, corn and green salad for dinner. Here is your Lunch Thought Bubble:

"Potatoes make good salad, and hey, there's one limp carrot and a stump of celery in the fridge. Perfect! For two kids, I'll cook a couple extra potatoes and that golden beet that's been in the crisper drawer. I could also pack an ear of boiled corn; potato salad plus corn would be a pretty filling lunch. Hmm, what for a vegetable? We're having green salad; kids won't want that. I know, I'll put a piece of broccoli in with the potatoes at the last minute to steam. Protein? If only my kids liked cold chicken...Oh well, I can just boil a couple eggs."

That whole thought process took about one minute, plus rummaging the fridge for the limp carrot and the celery stump. If your brain is tired, you can boil the eggs while dinner is cooking and then do lunch after dinner is over. Sometimes I get the kids to empty the dishwasher and wipe all the surfaces while I make lunches, then I do the wash-up afterwards. It would take 15 or 20 minutes for a tired me to make potato salad, deviled eggs and steamed broccoli.

On the other hand, you might just want to shoot the moon and do it all at once. Ready? Go!

Presumably your chicken is already roasting away in the oven. Put a couple eggs into the pot for the corn; while the corn water comes to a boil, chop up the carrot and celery and put them in a bowl for the potato salad. If you have something green like minced chives or parsley, that would be nice, too. (If you want lunch to be super pretty, instead of sending boiled corn, you could cut the kernels off the raw cob and put them into the potato salad. With the orange carrot and the green chives, it would look like confetti. If that's your choice, do it now.)

About 15 minutes before the chicken is done, put the small red potatoes into the pressure cooker; bring it up to pressure and cook them for 5 minutes. In the meantime, your corn water boiled and the eggs cooked 7 minutes; fish them out and add the corn. While the corn cooks and the potatoes finish, peel the eggs and devil them. Put them into whatever bento you are using. When the potatoes are done and the pressure is released, put the cut-up broccoli into the turned off pan on top of the spuds, put the lid back on and let it steam for three to five minutes in the residual heat. Pull the chicken out to rest and make the green salad. Dinner is ready.

While your family is making their way to the table, put the broccoli and the lunch corn in the bentos with the eggs to cool, and hide the lunch potatoes and the golden beet--not in the fridge, though, because the salad will come out better if the potato is somewhat warm. Enjoy your dinner knowing that lunch is all prepped.

While your family clears the table and the counters, cube the lunch potatoes and beet, mix with the chopped carrot, celery and chives, and season with mayo, salt and just a drip of vinegar, or whatever dressing your family likes. Bottled ranch might be good, or Italian dressing. Take the corn out of the bento boxes and pack the potato salad, the deviled eggs and the broccoli together. It should be nice and snug; if there's wiggle room, add a few cherry tomatoes or grapes or carrot sticks--you get the idea. Wrap the corn in plastic or put it in a small rectangular container; cut it in half, if necessary. A large ear might be enough for two lunches. Put the lids on the bentos and put everything away. That took about 10 minutes, and now lunch is done.

In the morning, put a bento, a corn, a container of cookies and a container of jello into each lunch box. Put the cereal and milk on the table. Hey, there's time to do your makeup and calmly sign all the pieces of paper your kids are bringing to you. No problem, honey. How nice is this?

Lest you think every morning is so blissful, tomorrow I will post a picture of what my kids walked out the door with this morning; not apples and peanut butter (we're out of apples), but definitely a second-string lunch. I was too tired to make lunch last night, so I ended up rushing around in the morning and growling at kids shoving papers under my nose while I was trying to make lunch. Why didn't you show me this last night??? But at least they got a lunch, right? You do what you can and enjoy the relaxing moments when they come.

Tuesday, September 13, 2011

A Week of Menus

Sometimes you don't sleep well, and you wake up tired, and you have no idea what to make for lunch. You consider taking it later, or just handing them cash and letting them buy whatever the cafeteria has to offer--but then you remember the time you visited and the children at your child's table were eating cold whole wheat tortillas topped with cold cheese; they told you it was "pizza." That's just wrong on so many levels.

So, by popular demand, here is a week of our go-to school lunches, all gluten-free, made with fresh local ingredients as much as possible. These can be mostly packed the night before; items that are packed in the morning have an asterisk.

Weekend Prep:
On Friday: Make sure lunch boxes are emptied and containers cleaned. Monday is bad enough without having to face putrescence.

Make jello cups or pudding cups or applesauce cups, enough for the week.

If you plan to bake cookies, freeze them IMMEDIATELY--out of sight, out of mind ; ) Make them the right size to fit into your containers. Cookies made with nut butter and granola can be very filling and nutritious, so even if your child eats nothing else, they won't come home starving.

Other make-ahead ingredients include pesto, boiled eggs, hummus, pasta and rice--one friend steams beets for the week and doles them out. Another friend's daughter wants pasta every day, so he cooks a couple pounds and just dresses a portion when he packs lunch. Hummus, pesto, pasta and rice can also be frozen in portions and thawed the night before. Heck, in an emergency, you can put a frozen lump of pasta and a frozen chunk of pesto in a container and instruct your diner to microwave it at school!

Spend 20 minutes planning your dinner and lunch menus; plan ahead when to cook extra for lunches. As much as possible, include lunch prep in your dinner routine. If you plan extras for lunch, put them aside right away! Have the containers chosen and ready, and while you holler "Dinner!" be packing up the lunch food before it ends up being someone's third helping.

A note on sides: For two kids, I have about twenty 4-oz lidded containers; that is a good size for most kids and adults, and you can underfill for tots. Ten are filled with jello on Sunday, and the rest are for packing sides. Have a few options, such as applesauce, cut-up fruit, cookies, edamame, dry cereal, 3-bean salad, cole slaw, steamed beets, etc.--whatever your diner likes that is easy to pack. If your child likes the cole slaw at dinner, pack a couple small containers for later in the week. Fruit is best cut up in the morning, but everything else can be packed ahead. If your child is staying after for sports, pack extra sides so they will have snacks for later.


LET THE MENUS BEGIN!

Monday: Leftover lasagne (or other leftover pasta), eaten at room temperature. Leftover green beans dressed with olive oil instead of butter so they won't be greasy when they're cold. Pack these into a sandwich box with a small ear of corn on the cob; they should fit snugly and not shift around. A little spinach or kale would be a pretty garnish.

Tuesday: Sushi rolls made with leftover short-grain rice and filled with tuna salad (or chicken salad, or vegetables). One roll per child, cut in half so it fits in the sandwich box. Fill the cracks with silicone cups of vegetables from dinner, such as steamed green beans and raw carrot slices. A bit of pickled or candied ginger is a nice addition.

Wednesday: Potato salad with other steamed roots such as golden beet, celeriac and carrot; add chopped raw celery and dress with mayo, salt and a drop of vinegar. Deviled egg. Steamed broccoli. A pickle would be good in this box.

Thursday: *Rice with sprinkles and steamed shrimp (or curry, or teriyaki). Warm the rice in the morning and let it cool while you do other things. Pack it firmly into half of the sandwich box and sprinkle with toasted sesame seeds and crushed nori. Top with shrimp, and fill the empty spaces with vegetables such as edamame and carrots.

Friday: Hummus (or other dip) with cut up vegetables, either raw or lightly steamed. (If your child has a sporting event soon after lunch, opt for steamed, as they are more quickly digested.) Put the hummus in a small lidded container; pack with the veggies inside a sandwich box with taller sides--this keeps the lid from popping off if the lunch is handled carelessly. Olives make a nice garnish.


Saturday: Use Vietnamese rice papers or lettuce leaves to make wraps. Layer lettuce, shredded veggies, rice noodles and/or lunch meat on the rice paper and roll it up. (Look on YouTube for instructions for doing spring rolls.) A couple wraps cut in half would fill a sandwich box. Garnish with cilantro leaves.

Sunday: Our last, and favoritest, go-to lunch: *Quesadillas! These are best made fresh. Have the cheese grated and everything else done the night before. In the morning, make the quesadillas and pack with a container of salsa and a portion of refried beans or bean salad. For super-yum factor and extra specialness, make a little layered dip with refried beans, salsa, sour cream, olives and chives, if you have those things around.

After a while, you will come up with your own "go-to" menus--anything that is easy for you to prepare and something the kids like to eat. In time, we hope they will start making their own darned lunch. Making lunch every day is a big commitment, and not always an appreciated one, but with a little planning it can be much, much easier. And without planning, there is always apples and peanut butter!

Thursday, September 8, 2011

Lunch Simplified

Hey, it's a new school year! Sorry I have not been posting pictures, but there should be some next week.

Today's post is about how to use your freezer to make mornings less hectic. Remember the cute little square silicone cupcake liners that you separate food with? Well, I don't use them for baking because they discolor, but they work great for freezing 1/2-cup portions. So for instance, if you make hummus, make a lot. Line up your silicone cupcake liners on a cookie sheet, then fill them with hummus. You can adjust the portions by how much you fill the cups; you can even mound it up. Freeze overnight, then peel away the liners and store the hummus-sicles in a ziplock bag.

This strategy would work great for runny foods that you might serve with rice, such as curries, teriyaki, chili, thick stews, or whatever. You could even do it with beans for salads. Thaw them overnight and, if appropriate, warm them in the morning before you pack them.

Thursday, June 16, 2011

Summer Lunch Strategies

What to pack for lunch when it's so danged hot out? It's the eternal summer question, right after "Mom, where's my swimming suit?" (Actually, the two most-asked questions are "Who left the door open?" and "Were you raised in a barn?")

If the lunch is kept in a climate-controlled room or in a cooler, proceed as usual, of course. If the lunch will be kept outside, you need strategies. Even the best lightweight insulated lunch bag with an icepack in it will only keep for cool for so long. If the food is well-chilled, if there are a few frozen components like frozen nuts or peas, and if there is a frozen juice or water bottle inside, the lunch will stay nice for three or four hours in the shade, depending on the heat. That might be enough for most circumstances. However, if it's super hot, or your diner is likely to leave the lunch bag in the sun, you need a new strategy.

In some conditions, you may want to use a small, hard-sided cooler with both an icepack and a frozen beverage inside. Rigid coolers insulate much longer, but they're heavy; you could send it to day camp, but not on a hike. This setup would allow you to pack most of the foods you have been using all year.

My strategy for hot days is raw produce, and not very much of it. Anyone who is not in a climate-controlled environment will be too hot to eat anyway. Pack cut-up fruit, crispy vegetables, dried fruit and nuts, and dried seaweed, if your kids like it. A few chips or crackers can be good, too. None of these foods will spoil easily. Cheese and jello melt, so don't even try. Boiled eggs are usually fine, but save deviled eggs for more temperate weather.

It is prudent to send along some wipes, or a small bottle of hand sanitizer, or even a few individually-wrapped alcohol swabs. Outdoors facilities are notoriously scarce and/or unpleasant; it's handy to be able to wash up before a meal without having to hike around. Wipes, swabs and hand sanitizer are also very useful for the following hot-weather tip, sure to become a seasonal favorite:


Bento Mom's Fail-Safe, Field-Tested, Pit Purification Protocol

If one is out and about in warm weather and discovers more fragrance coming from the shirt region than is socially acceptable, simply retire to the nearest restroom and use hand sanitizer or alcohol swabs to wipe the offending area. Repeat periodically as necessary. Bacteria is often the culprit in these situations, and Bento Mom's protocol knocks them out. This is a good tip for the preteens and teens among us who are not only more fragrant, with sharper senses, than we adults, but also still care what other people think. A few alcohol wipes or a small bottle of hand sanitizer are easy to carry discreetly.

Wednesday, June 15, 2011

Chips and Salsa and Guacamole

Organic blue corn chips with flax (from Target), salsa, guacamole, dried mango with chile; snap peas, radish and grapes.
Summer CSA season is here! Yesterday we picked up our produce, and La Segunda went out in the field and picked snap peas while La Primera and her friend climbed a tree. It's always fun to put fresh local produce into the lunchbox, especially if the kids helped pick it (or even choose it) themselves.

This lunch went together very quickly. You can pack everything but the dips the night before--keep the container of produce in the fridge. In the morning make the guacamole; you can make it the night before if you have to, but it's better fresh. One avocado made two portions. Pack it up and you're done!


Simple Guacamole

One ripe avocado
Lemon or lime juice
Salt
Optional: Minced onion, garlic and/or cilantro

Use a perfect avocado. Sometimes the grocery store will discount too-soft avocados and suggest you make guacamole. I suggest you let them alone. Too-soft avocados that are turning brown inside taste bad. Your perfect avocado, mashed with a little citrus juice and a little salt, will be delightful. I also enjoy minced onion in mine. Some people use a food processor to get a creamy puree. I prefer to grate or mince the onion, and mash the avocado with a fork so it will be chunkier. The joy of making it yourself is that you can have it just as you like it : )


Even Simpler Guacamole

If you ever find yourself in the unenviable position of walking in the door with children who are so hungry they are bickering and it is on your very last nerve, quickly dash into the kitchen, scoop that last ripe avocado you were saving for dinner into a bowl, mash it up with a couple spoons of salsa and fling it on the table with a bag of chips. The kids will still try to fight over who is getting the most, but their mouths will be full, dampening the sound. You will hardly hear it as you sit down with your sudoku puzzle.

Monday, June 13, 2011

Summer Lunch

Black-eyed pea salad, olives, carrots, broccoli. Blueberry gelatin, Trader Joe's meringue cookie plus a few TJ's chocolate pomegranate seeds.
Summer is here--time for lunches that are more vegetable-y and refreshing. Black-eyed peas make a nice salad because they're tasty, they cook fast, and they're small. There are several recipes on the internet for bean salads. I tend to make some variation of tabouli, substituting the beans for the bulgar wheat, but you could easily make something Italian, Greek, Mexican, or whatever seasonings you enjoy. This salad was made with minced herbs--cilantro, mint, scallions, basil--and dressed with olive oil and white balsamic vinegar. Toss in some carrots for color and a shake of salt.

Summer is the time to take shrimp off the menu, or any food that gets stinky when it's warm--remember, you're going to have to clean out the containers at the end of the day! This lunch will be nice to eat even in a warm environment, and leftovers won't make you gag even if the lunchbox is forgotten in the car overnight. It helps that all the ingredients were prepared the night before and well chilled. I made the gelatin firmer this week so it wouldn't melt as easily. An ice pack in the lunch bag helps, of course; even better, freeze a juice box or fill a water bottle with ice sticks and your diner will have a cool beverage to sip. For really hot days, stock up on frozen peas and add them at the last minute to bean salads, pasta salads, or even tuna sandwich filling. Another snack that freezes well is nuts. By incorporating a few frozen items into an already well-chilled menu, and by using an insulated lunch bag, you can keep foods safe and appealing up until lunch time.

Friday, June 10, 2011

GF Strategies

Yesterday I tried a new thing: Burritos wrapped in brown-rice tortillas. Usually I make quesadillas, but you gotta switch it up sometimes, right? Anyway, they were really fragile by lunchtime. La Primera didn't care, but La Segunda brought hers home in a delicate state, mostly uneaten. (I ate it, though. Yum!)

Some GF products, such as brown-rice tortillas or brown-rice pasta, are very delicious. For instance, with brown-rice pasta you get the benefits of whole grains AND the chewiness of regular pasta, which whole-wheat pasta lacks. (In fact, many of my non-GF friends have switched to brown-rice pasta; it's that good.) The downside of gluten-free products is that--well, there's no gluten! Gluten holds things together even in wet conditions. GF foods don't hold up as long. Biscotti will break off when dunked in coffee. Soup noodles and pasta salads will taste good the next day, but the noodles will have broken into smaller pieces. Brown rice tortillas filled with moist ingredients will soon become fragile.

You can still make all these dishes, just adjust your strategy. Wrap burritos in parchment and instruct your diner to leave it wrapped and just fold down the paper as they go. Or instead of burritos, send quesadillas and put beans and salsa on the side. For pasta salads, boil the noodles the night before and chill them, then mix the salad in the morning. You can also add chilled noodles to individual servings of hot soup to cool the soup and warm the noodles. Those nice Vietnamese rice papers make great roll-ups, as long as the fillings are fairly dry and the dip is on the side. As for biscotti and cookies--well, just dunk carefully! GF takes a little forethought, but once you are used to it, it's a breeze!

Thursday, June 9, 2011

Assembly Line Lunch

Five in one blow: Sushi with brown rice, asparagus and avocado; steamed greens with soy sauce and sesame seeds; grapes; carrots. Mango gelatin on the side (not pictured).
Yes, I finally made a Japanese-style lunch with sushi in it. What took so long? Well, the nori I have on hand is not the best, but I needed something that would be good on a hot day, could be made ahead, and didn't require me to shop again. I was making lunch for the masses today, so it made sense to do the sushi and greens last night, then assemble it all in the morning. The silicone cups keep the flavors separate and also keep the nori rolls dry. For lunches, I leave the nori rolls uncut; it travels better that way, and is less likely to be distributed to everyone who asks for a piece ; )  (As a safety note, some smaller people find nori hard to bite and chew--you should definitely cut their sushi up.)

Sushi is a flexible lunch option. It can be filled with a variety of vegetables, or shrimp, or even tuna salad. You can roll it, as above. You can make chirashi sushi, which is sushi rice with the "fillings" on top. You can even make pressed sushi: Line a container with plastic wrap or parchment and layer warm rice, then fillings, then more warm rice. Press it down to fuse the layers, then cut it into shapes; it is like little sandwiches. The other great thing about sushi is that, once you have everything assembled, you can roll lots of them in a short time, so it's good for days when you are making LOTS of lunches.

Here is a great instructional video by a raw-food chef using a parsnip "rice" in the sushi. His instructions for making tight rolls are great. And parsnip "rice" really is delicious, by the way!

http://therawchef.com/therawchefblog/raw-food-recipe-sushi

Saturday, June 4, 2011

GF Granola Revealed!

One of the hardest things about going GF/corn-syrup-free is breakfast. For me, anyway. What does this have to do with bento? Well, if I'm making lunch, I don't want to be making breakfast at the same time. You have to draw the line somewhere or you'll just turn into a crazy person. Cereal is easy, but most GF cereals are expensive. My husband, bless him, would make eggs or Cream of Buckwheat or miso soup in the morning. But he has to get ready, too. Our kitchen is too small for everyone to be in there making their own breakfast. What to do? Then, two days ago I made an amazing discovery in the Indian section of the grocery store: Poha.

Poha is precooked, rolled and dried rice flakes used to make quick and savory Indian breakfasts. It has been around for ages, of course, but the light bulb never went off before. For you see, it has the perfect dimensions to for granola, and it is pretty cheap. Hooray! And yesterday the temperature dropped from the mid-90s to the mid-60s, the perfect conditions to turn on the oven. Clearly, the granola gods were pointing the way. Last night I made an "imperial buttload" (to use one of my husband's units of measure) of granola. It will not only make a good breakfast, but can be sent as a snack in the kids' lunch bags!

There are only three components in granola: Dry stuff, syrup and dried fruit. Dry stuff is your bulk, syrup is your glue/sweetener, and dried fruit provides little treats. You add the dried fruit at the end or it turns into little rocks in the oven.

How to make granola: Mix a bunch of dry stuff together in a bowl--leave plenty of room for mixing. Melt honey and oil in a saucepan for the syrup; you can use other sweeteners as well. Toss the syrup with the dry stuff. Toast the raw granola in the oven on cookie sheets at about 325*. (You may need to do this in several batches so as not to crowd the pan.) You will need to stir the granola every 10 minutes or so to help it toast evenly. When it is toasted to your liking, pour it into a big bowl to cool. It will still be slightly soft and damp when warm--this is a good time to toss in salt and cinnamon. Once all the granola is cooked and cooled, you can stir in the dried fruit and put it into a sealed container. Yum!

Here's what I used in this batch--of course, I just chucked things into a big bowl without measuring, and you could do the same. Just use what you have and like. I didn't add cinnamon or nutmeg this time, just a bit of salt:

~1 pound of Bob's Red Mill oatmeal
~1 pound of thick Poha flakes
several big handfuls of raw sunflower seeds
~1 pound of dry coconut
handfuls of flax seed
~1/4 cup coconut oil + 1 splash sesame oil (you can use any mild oil you have on hand)
~1 cup honey (for this amount of stuff, that made a mildly sweet granola)
dried, sweetened orange-flavored cranberries

I have used dry Cream of Buckwheat, but it's granular, not flakey--Poha is so much better. You can also add any kinds of seeds you like such as chia or sesame, and chopped nuts. For the dried fruit, you may need to cut it into smaller pieces.

Reality check here: La Segunda has decided that she hates granola. *Sigh*  But La Primera and her father are very pleased, and that's good enough for me.

Thursday, June 2, 2011

Apologies to All!

Gee, I love everyone's comments! So sorry I never respond; it's not that I don't want to, I just haven't figured out how. The instructions at Blogger don't seem to work for me. But please keep those comments coming, and thanks to everyone for your support! Sending warm-sushi-rice love to you all!

Love, Mom

Thursday, May 26, 2011

Meat & Potatoes & Black-Eyed Peas

Mmmmmm...Scotch eggs, potato salad, olives, pickles, carrots.
Sometimes you just have to get fancy. I made scotch eggs for dinner and saved out a couple for lunch. Mr. Meat-and-Potatoes (that's the guy I married) was thrilled. They are actually not hard to make, just a bit fiddly. They come out better made with small eggs or quail eggs, if you can get them. One of the kids complained that I did not devil the eggs, too. If you're feeling like your cholesterol needs a little extra boost, by all means, devil the eggs. And, sure, I'll have a bite. Otherwise, if you are good at timing eggs, just undercook them a bit so the yolk stays creamier.

Vegans, do not dispair! Just think "falafel" with stuffing! For instance, you could use felafel mix, or leftover lentils-and-rice, or maybe mashed potatoes with a little flour mixed in. Season to taste and wrap it around a small button mushroom, or some cooked eggplant, or a cherry tomato, or tofu-kan colored yellow with turmeric--anything that makes a pretty surprise inside when it's cut open. The pre-cooked filling is not just to be pretty--it's so you can cook the coating to perfection without worrying that the middle is raw.

My absolute favorite bean fritter is Akara:

Akara (African felafel)

Soak some black-eyed peas until they're plumped up, all day or overnight. Grind them in the food processor until smooth with salt and any spices you want. Cumin is always a good one. At the last minute, add some flavorings such as chopped onion, chopped red pepper, parsley and/or cilantro and pulse a few times to incorporate them but not completely break them down. The vegetables should be no more than about 1/4 of the total mass.

You should now have a stiffish batter. Shape the batter into patties or balls. We prefer patties because there's more crispiness, and you can be sure the inside is cooked before the outside is burned. An ice cream scoop works great for quickly shaping many same-sized portions. Fry in the oil of your people, or bake if you prefer. These are so good you will not believe you never ate them before. Way better than felafel, imho.

If you want a "real" recipe, there are many on the 'net. Here's one to get you started: http://www.foodnetwork.com/recipes/saras-secrets/akara-recipe/index.html

Tuesday, May 24, 2011

Layout Fun

Hummus, grape leaves, celery, apples. GF pretzels and sliced mango not shown.
We eat a lot of hummus. It's delicious, nutritious, easy to make ahead, easy to transport, and is a great vehicle for increasing consumption of raw vegetables and fruits, plus it's quickly made from ingredients on hand. You can't go wrong. So, how do we keep it interesting? We change up the dippers; besides obvious ones like carrots, celery and pepper strips, there are peeled broccoli stems, mild radishes or turnips, or snap peas, to name just a few. It gets a bit thin in winter, but come spring the variety is endless. And, of course, we love the sweet-tart-crispiness of apple slices.

There were not many dipper options on hand this morning; luckily there was a can of grape leaves on the shelf. To make it interesting I laid out the components in a pattern of perpendicular stripes; I put the celery next to the grape leaves since they are sometimes oily, which is not bad for celery, but not great for apples. Apple slices cut in eighths look nice laid out this way, and you can fit more of them into the box. (In fact, if you are packing a container with an entire apple--that is, eight pieces--try cutting both a red and a green apple so you can alternate red and green stripes.) Little touches like these are fun for the packer and for the diner, and they take only a few more seconds.

Thursday, May 12, 2011

Small Acts of Love

As I bid my husband goodbye this morning and handed him his lunch, he was quiet for a second, then had a recollection from many years ago. It seems he and his brother George were in high school and stopped at his sister's for coffee. As she chatted with them, she warmed the mugs with hot water before pouring their coffee. It was a small gesture, but an act of love both so unassuming as to be easily overlooked, yet so powerful that to this day the recollection reminds him how much his sister loves him.

There are many small ways to show people we love them. Maybe warming their coffee mug. Maybe making them gelatin. The heart of bento, for me, is not to make the prettiest lunch or the most nutritious. The heart of bento is to send something tangible but ephemeral that, even though it will be physically gone in a short time, will always remind your diner that they are loved.

Wednesday, May 11, 2011

Tamale Tips

Can anyone tell me how to leave comments? Even though it's my own blog, I cannot figure it out. The downside of being a Babyboomer, I guess. So here is a reply to N's desire to know more about making tamales:

First, the directions on the Maseca bag call for using baking powder. This makes the tamale dough less dense, but gives it a funny mouth-feel. I leave it out, and make the tamales fluffier by beating the shortening very well.

Regarding shortening, don't use conventional lard. If you don't have a source for clean lard, or would like to make them vegetarian, I suggest using coconut oil or palm oil; they're solid at room temperature and don't contain transfats. which are evil at room temperature. If you are afraid of solid fats, don't make tamales. (Although if you have a good recipe for fat-free tamales, by all means post it!)

When you make the dough for bento tamales, make sure it is not too stiff, since you don't want the tamales to be hard at room temperature. Use enough water that the dough spreads easily but is not too soft.

My very favorite filling is a stick of cheese, a few leaves of cilantro, and a spoonful of green tomatillo sauce. Serve with more tomatillo sauce on the side. Mmmmmm.....

If you don't have a friend to show you, YouTube is your next-best resource for learning how to make any kind of food. Happy rolling!

Tuesday, May 10, 2011

One Hot Tamale

Tamale, pickles ramps, calamata olives, extra sauce for tamale, rice and salsa.
Mexican bentos rule. Last week I made an enchilada bento, but forgot to take a picture. The bento pictured above was packed cold for my husband, who has a microwave where he is working. For the kids, I warmed the tamale and rice before packing. Heating the rice with a bit of water also softened it enough so that it won't be hard at room temperature. If I had corn, I would have stirred some into the rice for color. Since it's a bit on the starchy side, I included a side container of apples, and of course the pickled ramp will be a refreshing foil. Your bento does not have to be made of Japanese food to be a satisfying boxed lunch.

Tamales are quite easy to make, and they're a good way to use up odds and ends. Traditionally you would roll them in corn husks or banana leaves, but a square of parchment or foil tied with kitchen string works, too; some ladies use the food-service waxed paper or foil squares that are pre-cut and come in a box like Kleenex. Most grocery stores sell Maseca, which is dried masa, and it has instructions on the bag. Instructions for rolling are beyond my scope, but there are probably numerous YouTube videos. Let me just say that, if you have a helper to tie them and a pressure cooker to speed the steaming, you can make a dozen tamales in short order. We ate half for dinner and saved the other half for lunch.

For fillings I tend to use leftovers, especially ones that are skimpy or visually unappealing, like all the scraps of meat you picked off the carcass when you made stock, or the leftover pulled pork that's not quite enough for everyone. (Or that delicious beef tongue you should have disguised better before serving it the first time.) These were made with chicken shreds, black olives and enchilada sauce. A nice vegetarian filling would be cilantro and cheese, or a filling of beans, corn and olives. Tamales are very good travel food--easy to eat, not messy, come in their own container--and as such should be added to anyone's bento repertoire.

Pickled Ramps

1 cup white balsamic
1 cup water
2 Tbsp sugar
1 tsp salt
ramps

Clean the ramps and cut off most of the leaves (use them in soup or stir fry). If you are using a pint jar, just cut them about an inch shorter than the jar. Pack as many into the jar as you can without bruising them. Warm the brine to dissolve the sugar and salt. Let it cool, then pour over the ramps. Screw on the lid and put them in the fridge. They'll be ready in a couple days. Mmmmmmmm.

Faux Enchilada Sauce

This is my lovely sister-in-law Jenny's no fuss, no recipe way to make enchilada sauce when you live two miles north of Podunk in The Land Mexicans Forgot. This is not authentic, just easy and tasty. And gluten-free, which the canned ones are not.

tomato (sauce, diced, puree, paste, whatever)
canned chipotles in adobo, to taste
olive oil
garlic
onion
chili powder (or paprika, cumin and oregano)
salt
tiny pinch of cinnamon

Put everything into the food processor. You may sautee the onions and garlic first if you like. If using tomato paste, add water. Blend and taste. Use.

For example, when I made this last week, I used a 28oz can of diced tomatoes, 1/3 of a small can of chipotles, a glug of olive oil, one onion diced and sauteed, one garlic clove, a tablespoon-ish of paprika, about 2 tsp of cumin, and no oregano cause I'm out--I might have subbed a shake of poultry seasoning. It made some fine enchiladas last week, and worked great in the tamales, too.

Friday, May 6, 2011

Wholesome Leftovers, Artfully Arranged

When your child is on a special diet--and frankly, any diet that contains no processed foods is a special diet in most public schools--it is important to get into the right mind set. We first began this journey in response to the children's digestive and behavioral issues: At ages two and four, one used to rock herself for hours, while the other went all glassy-eyed and banged her head on the floor. In desperation I tried an elimination diet, and as soon as I removed wheat, things improved markedly. Removing wheat took away one layer of interference, making it easier to identify the next thing, which was corn. It took a couple years to get it right, and we made plenty of mistakes. The biggest mistake was to feel sorry for ourselves.

After about a year of diet modification, the kids began to have a "poor me" attitude about food, and the food other kids had looked desirable. It was compounded by the fact that other people also felt sorry for them, like they were being deprived. That is when I began a campaign to turn our mindset around.

The very first thing was to help the kids understand what we were doing. I tried to make it clear that I was giving them the very best materials they would need while they were growing their bodies. We talked about their great-grandmother who grew up on a farm eating nutrient-dense foods; now she eats mostly processed food, but because she grew up eating well, it gave her good health for most of her life. I also pointed out how many children have families that do not know how to cook, and who never get to eat food made with love. We made a point to frequent small mom-and-pop eateries where food was made from scratch, and went to lots of potlucks with others who liked to cook. In this way, the children got the idea that home-cooked food equals love. I also taught them to cook simple dishes so that they had power over food. Eventually, they came to see that, rather than being denied something, they were being given an incredible gift. Their "special" diet truly was special!

Their first school experience was the Friends Western School in Pasadena where they learned to get along with others, and were exposed to different, but mostly wholesome, lunches. Still, it was a struggle keeping the kids from eating wheat or corn from other people's lunches. That's when we got our first bentos, and that's where I came up with the next part of my "special lunch" philosophy: Not only should your child want to eat it, but other children at the table should want to eat it, too. Psychologically, that puts your child at a huge advantage. They get less hassle about what they're eating and are more able to deal with the questions and the inevitable amount of teasing. When other kids admire or even want to sample their lunch, they are empowered, instead of victimized, by their special diet. There is a huge difference between "I can't eat that" and "I get to eat this."

Now the kids are older, and we have moved to a small town. We have had to take the bento up a notch: I pack more food, and it has to look better, because peer pressure is a very real thing in third grade and beyond. Not only that, but in our small town the food my children eat seems even more strange. In Southern California, no one would look twice at jicama, but during La Segunda's first month of school here, a child asked her, "What's that in your lunch?" It was an orange cut into quarters. The child had only ever eaten canned oranges. So be sure to pack enough to share. (It's not allowed at our school, but the kids do it anyway.) That helps pave the way for the notion that food can be made from scratch.

Sometimes after watching a movie like "Supersize Me" or "Food Inc," the children will come home and make fun of the fact that so-and-so was eating Lunchables, or had nothing but candy and cookies in their lunch. I realize that, to some extent, it is to help themselves feel better about being "different." But it's important to point out that the other kids or their parents just don't know about food, that across the USA there are children whose parents and even grandparents grew up eating packaged food and do not know how to cook. I observe how lucky we were to have had food issues that led us to cook everything ourselves, and mention that their schoolmates probably know about lots of things that we are ignorant about. At this point we talk about what other kids or their parents are good at. Eventually that degenerates into "who is the best at belching sentences," but the point is well taken.

On the positive side, my children are ambassadors of good food. They have displayed and even sampled out such heretofore unknown comestibles as turnips, nori, Jerusalem artichokes, and mango. Many children do admire their lunches, and some lunch monitors make a point of checking it out. Their friends have been known to go home and ask their parents if they can have broccoli or cherry tomatoes in their lunch, too. Children are often amazed at the marvels that can be made by a brilliant chef such as myself. Just last week, I heard that I am known as a genius because I can make gelatin from scratch. Seriously. In a world where oranges are unrecognizable and gelatin is beyond the skill of mere mortals, it does not take much to impress. Yes, they still get teased, and they still sometimes bring lunch home uneaten, but with the right PR behind you, wholesome leftovers artfully arranged in a box can improve many lives for the better.